Hatha is a fantastic place to start practicing yoga. It is gentle and slow, and encourages the students to focus primarily on aligning their body properly and take the right form for supporting the bodies.

What Is Hatha Yoga Poses?
There are some very basic hatha yoga poses, which can be practised easily at home. Given below are some of the hatha yoga poses for beginners:1. Mountain Pose

This is the first pose, which is to be started on the top of the mat. And, this will also be the last position in the set of exercises explained below. So, you will start with mountain pose and also end with mountain pose. After taking a few deep breaths, and calming yourself, you should stand tall, and start inhaling with your arms raised upwards toward the sky. Relax your shoulders, and stretch them to left while you exhale. Using the next inhale for drawing back to the centre, exhale and stretch towards the right.
2. Forward Fold
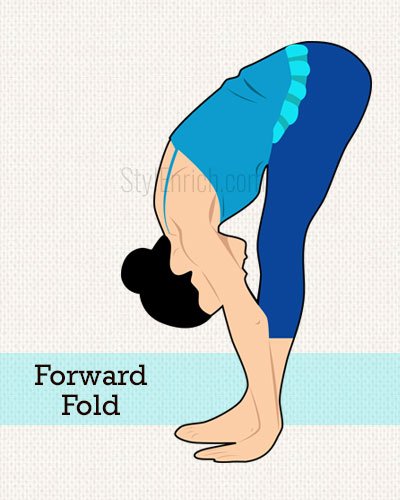
This is the next stage of the hatha pose. Try exhaling while you fold forward. Let the arms, neck and hand hang to the ground. Take 3 to 5 deep breaths for relaxing yourself. Bend your knees slightly, and try to concentrate on lengthening the spine.
3. Low Lunge (On The Right Side)

By placing the hands on to the ground, support yourself. Stepping the left foot backwards, release the left knee on the ground. Now, keeping the right knee directly aligned on the right ankle, and inhale so that you can lift up tall. Then, lengthen via the crown of the head. Using exhale for sinking forward, release the hips towards ground. Place your arms in a comfortable position on the ground, or on the hips, or even raised above, reaching the sky. Remain in this position for about 3 to 5 counts.
4. Downward Dog

With your hand up, try to bring them back down towards the ground, and keep them on both sides of the right foot. Now, pressing into the hand, try to draw the right food back, and take the pose of the downward dog. Your fingers should be widely spread. The knees should be slightly bent and the hip bones should be reaching up above towards the sky. In this position, try to hang your head heavily, and let it remain here for about 3 to 5 counts.
5. Low Lunge (On The Left Side)

As you try to raise the left leg upwards towards the sky, reach out through the toes, and inhale. While exhaling, draw the left foot forward, keeping it between both the hands. Now, drop the right knee to the ground, and dive the hips forward so that you find the low lunge on to the left side. Stay here for 3 to 5 counts or breaths.
6. Forward Fold

Taking a deep breath, lift the right knee from the ground. Press the left foot so that you are able to bring the right foot forward. Now, try and release the torso so that you are in a relaxed forward fold position.
7. Mountain Pose

This is the same position from where you started off. Placing the weight evenly between the feet, inhale deeply, and roll up so that you are standing. Now, let the arms follow up, and take your hands upwards towards the sky. Exhale and release the hands to both the sides of the body, and take deep breaths.
Given Below Are Some More Hatha Yoga Poses And Names
Hatha Yoga Poses And Names
1. Warrior II (On The Left Side)

On the mat, step back with the right foot. Now, turn the right toes in such a manner that they become parallel to the back of the mat. Then, turn the left toes in, and taking a bend with the left knee, try to draw the arm upwards so that they become parallel with the ground. Try to remain in this pose, by glancing over the fingertips on the left, and stay there for about 3 to 5 breaths.
2. Reverse Warrior (On The Left Side)
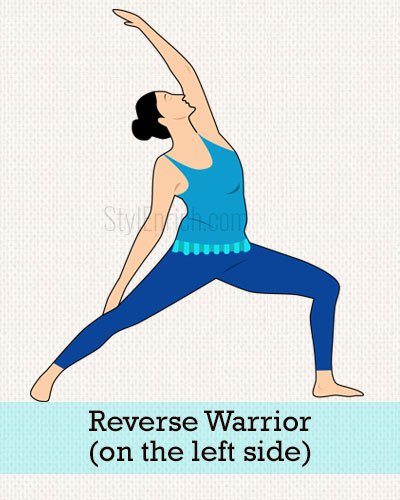
This is the reverse of Warrior II. Inhale deeply, and then drop the right hand on to the right leg. Now, take the left hand upwards towards the sky, for taking the Reverse Warrior position. Now, reach back and stretch the front portion of the body.
3. Warrior II (On The Right Side)

Keeping the arms parallel to ground, straighten out both the legs. Now, by turning the right toes so that they face the front side of the mat, exhale deeply. Bend the right knee, and sink into the Warrior II position on the right side. Take deep breaths for 3 to 5 counts, while you glance over the right fingertips.
4. Reverse Warrior (On The Right Side)

While inhaling deeply, draw the right arm towards the sky, and take the Reverse Warrior position on the right side. For coming out, step the left foot slightly towards the front portion of the mat, so that it meets the right foot. Now, release the arms on both sides.
5. Tree Pose
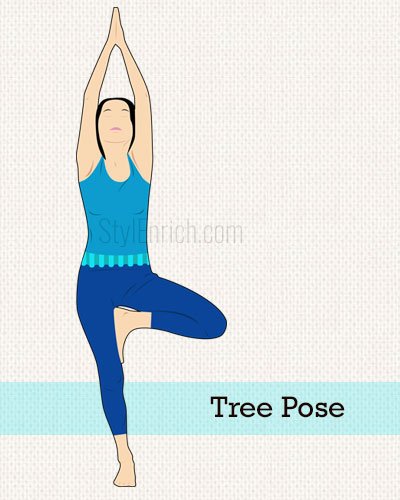
This is a very common stretching exercise. By drawing the hands to the hips, try to find a balance on the right foot. Now, place the left foot on the ankle, then, calf and then the thigh. Try to find a place where your eyes can focus, while you stretch your hands upwards towards the sky. Maintain the balance for about 3 to 5 breaths. Try to keep the stomach engaged, and you could even try to challenge yourself by waving the arms gently front and back. After you complete this, try to slowly release the left foot on to the ground, and try to repeat this tree pose with the other leg.
6. Bridge Pose
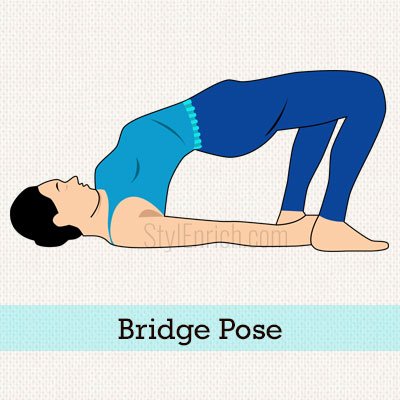
The bridge pose is useful for stretching the neck, chest and spine. Lie down on the back with the knees bent, and arms on the side. Keep the feet soles flat on the ground, and move the heels closer to the glutes. After exhaling, press the arms and feet into the mat, and push the hips in the upward direction. Clasp the hands below the pelvis and lift the chin up slightly, keeping the shoulder blades pressed down. Hold it for 30 seconds and then release it.
7. Bound Angle
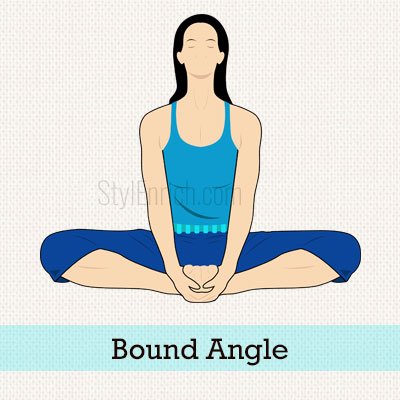
This pose is also known as the butterfly pose. Sitting on the floor, bend the knees and place the feet together so that the soles touch each other. Pull in the heels towards the pelvis and press the knees down to the floor. Sit straight and try to relax the shoulders, and keep holding the pose for about 30 seconds.
8. Seated Twist

A seated twist pose is useful for stretching the hips, shoulders and back, and increases the circulation and strengthens the oblique muscles. For this, you will need to sit on floor, and extend the legs. Cross right foot over the left thigh, and place the foot on the floor, flat. Then, bend down the left knee. Move the left arm towards outside of right knee, so that the elbow touches the thigh. Twist the body towards right and hold on to it for 1 minute.
This was the hatha yoga poses chart. You can practice these, and see a difference in the way you think and feel. There are numerous advantages of practicing hatha yoga. Given below are some of them:
Benefits of Hatha Yoga Poses
As Hatha implies physically practising yoga, all the poses, which involve any kind of stretching, bending, balancing, twisting and squeezing the body, will fall under this category. The physical practise of yoga is different from the breathing techniques and meditation, which are also a part of the comprehensive yoga. When you exercise your body with all these positions, you do a lot of good to your muscles, joints, organs, and most importantly, your mind. Each hatha yoga poses give innumerable benefits.1. Benefits The Heart
Regular practising of yoga can help in alleviating the high blood pressure. It will also help in reducing the angina problems, suffered by people with cardiovascular issues. Yoga also helps in improving the way the blood flow happens to the heart.2. Builds The Density Of The Bones
Some of the weight-bearing poses of yoga, like the Triangle, Warrior I, Warrior II, Warrior III, Tree, etc. help in reversing the bone loss in the people, who suffer from osteoporosis. Only 12 minutes of exercise is required every day for building the bone density in the femur and the spine.3. Strengthens The Core
The hatha poses help in improving the strength of the core. A strong core is very important for the body, as it keeps one functional, and wards off all kinds of injuries. The core consists of abs, spine and hips. Some important poses include Plank, Boat and downward facing dog. These help in strengthening the external oblique. Warrior 1 and Chair target the buttocks, while Chair and Half-lift also help in improving the para-spinal strength. These are the muscles that surround the spine and assist in bending and twisting.4. Mobility Of The Joints
When the joints do not get much activity, they stiffen up and have a limitation in movement. But, with hatha yoga poses, your joints get worked in various directions, and this improves the flexibility and mobility. A 1 and half hour session of yoga every week helps in improving the mobility of the joints, particularly, the spine, for women in the age group of 50 to 70.5. Stronger Back
Hatha yoga is also effective in treating the symptoms of lower back pain, and in preventing disabilities, which are associated with it.6. Posture And Balance
Yoga also helps in improving the balance and posture, so that you don’t fall and hurt yourself when you hit rough terrains. You can also stand tall as your posture will be improved.Do remember that all these exercises require focus and concentration. You can repeat these exercises a few times, but do them slowly so that you are able to concentrate on each subtle movement of the body. Doing these exercises will surely give you the peace of mind. Your breath will become your guide, as you gently inhale and exhale through the movements.

No comments:
Post a Comment