Friday, 6 October 2017

Oil Pulling Is One Of The Greatest Trends And Here’s Why…

If you believe in the ancient techniques of removing toxic substances from your body, you would love this awesome therapy called oil pulling! In today’s hectic and fast life if you do not get enough time to free your body from toxic substances, this is the easy and comfy way to flush out all the toxins and lead a healthy life!


Peep in this traditional Ayurvedic technique for removing toxins from your body with this awesome guide! Here is all you need to know about this awesome and unique technique!

  • What is Oil pulling?
  • Which oils are used for the traditional oil pulling technique?
  • What are the benefits of oil pulling?
  • How to perform oil pulling at home?
  • Oil pulling task and its impact
  • FAQ about oil pulling
Benefits Of Oil Pulling


What Is Oil Pulling?

Oil pulling is simply an awesome technique which is hidden in the ancient secrets of Ayurveda! For removal of toxic substances, this is one of the traditional and promising techniques which have now gained fame! Ayurveda has an amazing treasure of treatments for each organ and different benefits in which, oil pulling is the best one for improving oral health!


It is a technique in which natural and herbal ingredients along with oils are used to make the teeth while, improve oral health and to also improve overall body health.  It is helpful in fighting the bacteria hidden in your gums, teeth and mouth!


Swishing oil in the mouth for a certain time period and leaving it in the mouth to fight the bacteria, toxins and harmful substances cleanses the gums and teeth effectively!


This technique is also known as kavala graham or gundusha treatment for a gorgeous smile and amazing oral health! Plague is a harmful element which can worsen your oral health and thus, this amazing treatment can be sued to brighten up your smile and make your mouth beautifully cleansed! Detoxify your mouth with this amazing traditional method and improve your health!


Which Oils Are Used For The Traditional Oil Pulling Technique?

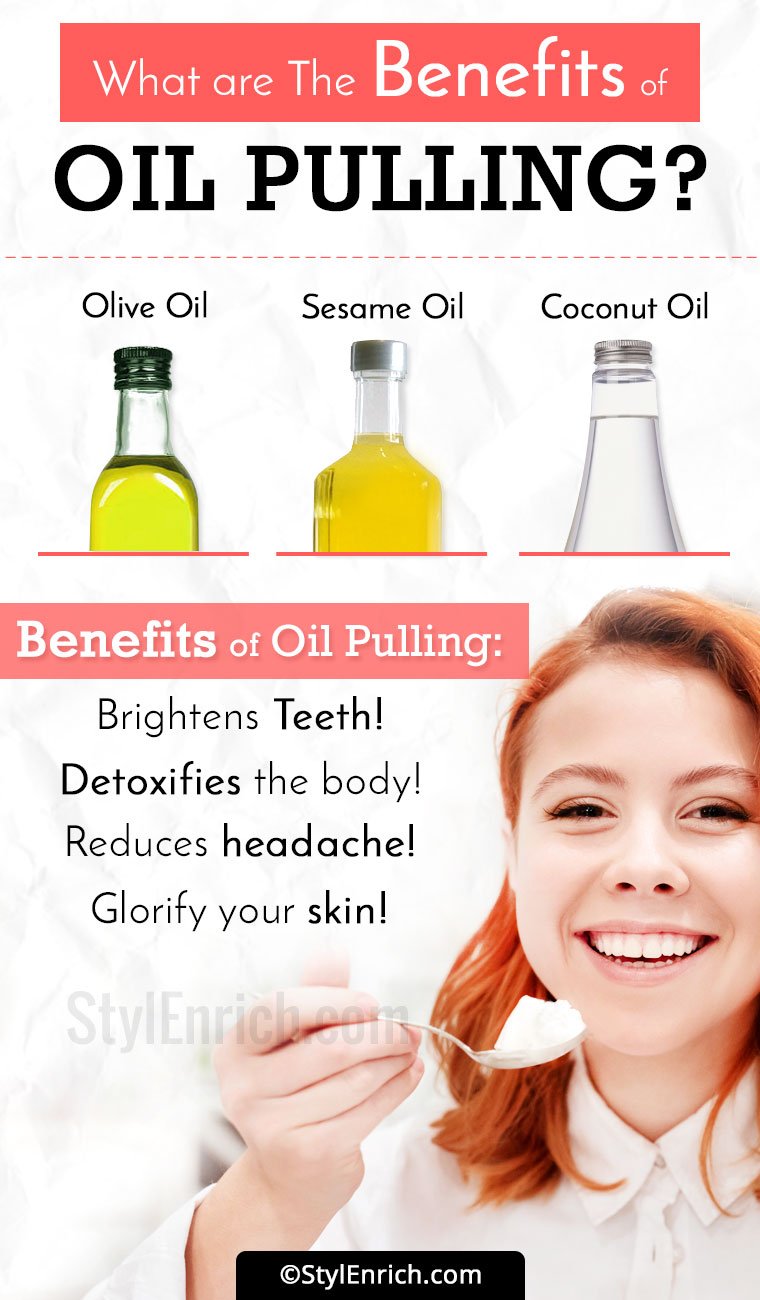
Oil pulling is a technique in which are oils are used for mouth cleansing. There are different question regarding the usage of oils in this process. Generally, coconut oil is considered as the perfect oil for mouth cleansing and to fight bacteria.


This is a method in which, the oil is not absorbed but is swished in the mouth and then removed. Thus, coconut oil is considered as the prime choice for oil pulling treatment


Coconut oil has lauric acid, antioxidants and minerals which can help in improving gum health and thus, give coconut oil the first preference!


Extra virgin olive oil is also used to cleanse the mouth and improve the oral health using this awesome technique. Sesame oil is traditionally used for this treatment along with sunflower oil and ghee! These are the possible options which you can use but consider the steps and effects of using oils before you proceed. Also, people use baking soda along with coconut oil to get more effective results and improve the throat and other organs in this process!


What Are The Benefits Of Oil Pulling?

People go for various therapies to extract its benefits while oil pulling is a technique which has uncountable benefits on your body! Not only on the mouth but for your overall body, this technique works magically! Here are some promising benefits of this ayurvedic treatment which you must consider!

1. Whitens And Brightens Teeth

  • This is the most amazing benefit of oil pulling for which, this technique is widely used. Oil pulling brightens the teeth and makes them glow!
  • The oil pulling treatment promotes antibacterial and anti viral benefits on the teeth and makes the teeth clean, bright, healthy and strong
  • If you always dream of gorgeous white teeth and an adorable celeb shine in your smile, you must try oil pulling once and get people crazy about your smile!

2. Helps In Detoxifying The Body

  • Detoxification is a process of removing all the harmful bacteria and substances out from your body. This is an amazing detox process which can fight the toxins and flush them out of your body!
  • Germs and bacteria in your gums can make you ill. While you consume food, these bacteria gets in your body along with the food and make you ill
  • Your mouth is the basic platform for the bacteria and germs to get in the body and thus, this mouth cleansing process is considered as the best detox treatment for your body!

3. This Process Fills You With Energy And Freshness

  • We all know that various detox processes and treatments are effective in bringing amazing energy to the body. While your body gets detoxified, all the germs and harmful bacteria get thrown out of your body and you feel energetic and light!
  • Germs can make you ill, lazy and tired which are battled with this amazing process.
  • From mouth and from the entire body, the toxins get removed which would make you feel instantly light, energetic and refreshing! Thus, undergo this cool oil pulling method to get energy and to fight laziness!

4. Helps In Reducing Headaches

  • If you are the one who constantly suffers from extreme headaches, this is due to the jamming of toxins and bacteria. Sicknesses and bacterial infections can cause headaches and this treatment has a direct impact on headaches!
  • When your body gets filled with toxins and the detoxification process is not performed, it can result into various diseases, headaches, migraines and such conditions.
  • To remove the toxins from your body detox process like oil pulling is required. Once you perform this amazing process, all your toxins would get flushes off from your body making you feel light and energetic!

5. It Can Glorify Your Skin

  • Gorgeous and bright skin is no more a dream if you once try this awesome detox process. It is a very well known fact that the skin is the reflection of internal health and thus if your body is cleansed, your skin would glow!
  • If your body is free from toxins and germs, it would get reflected on your skin and would make it look pigmented, patchy, dull and rough
  • All the skin issues are due to low blood flow and due to the jammed toxins which make the skin look undesirable!
  • When your body gets detoxed, the blood supply gets boosted and your body gets free from toxins which would also glorify your skin! Thus, detoxification pores can make your skin look gorgeous radiant and bright as never before!

6. Improves Oral Health

  • Oral health is the first and primary benefit of oil pulling. From tooth to the gums, bad breath to cavities, there are different problems which can be battled with oil pulling.
  • There are various bacteria like mutant bacteria which can act as a trigger to tooth decay. Also, plaque can make your mouth and gums damaged!
  • If you have gum issues, teeth issues, bad breath, and cavities, you must go through this amazing process which can fight such oral health issues and improve your oral health!

7. Improves Digestion And Repair Stomach

  • Stomach issues like constipation, diarrhea, stomach cramps are triggered due to toxins and germs which make your stomach upset.
  • Toxins can clog your digestive system which is the basic and most important systems of your body. If this system does not work effectively, it can cause numerous side effects!
  • Removal of toxins from your body would automatically aid digestion and would prevent such stomach issues!
  • Thus, for overall health and to aid digestion, you must perform oil pulling at least once a month and make your body healthy!

Along with these benefits, oil pulling has the amazing impact on heart disease, cancer, skin disease, kidney issues, insomnia, hormonal issues, allergies, joint pain and such other problems.


Removal of toxins from the body is the key to healthy and fit life which is promoted with this ayurvedic treatment. Thus, try this multi-benefit process to heal your body and cleanse it effectively!

How To Perform Oil Pulling At Home?

Well for me, it was simply irresistible to try this amazing and promising ayurvedic detoxification process! After knowing its magical benefits over the body, here is the way to perform it at home! Try this amazing process and get all of its benefits!

  • Oil pulling is the process which needs to be performed with an empty stomach. Make sure you eat nothing before performing this treatment. Also, don’t brush or floss your mouth before this treatment!
  • Use the extra virgin olive oil or the best coconut oil for oil pulling. Swish around 2 spoons of coconut oil in your mouth and keep moving the oil in each corner of your mouth.
  • Let it pass through your gums, between the teeth and everywhere in your mouth. Remember, you don’t have to swallow this oil as it would also make you swallow the toxins. Thus, keep swishing the oil gently in your mouth.
  • Perform this activity for 15-20 minutes. Within this much time, the toxins from all around your mouth would gather and get stocked in the oil and get removes from your mouth.
  • Now spit out the oil from your mouth in your dustbin or handbag and throw it. Your mouth would feel sticky and oily for some time. To reduce this oiliness, you can gargle and wash your mouth with Luke warm salt water.
  • This would completely fight all the bacteria and germs from your mouth and also banish the oiliness which is caused due to oil wishing!
  • Brush your teeth with your regular toothpaste and cleanse your mouth with a splash of freshness! Here’s the easy and quick process of oil pulling which gets completed so smoothly!

After this amazing process, your mouth would feel fresh; your body would feel light and energetic. However, these may not be the instant results of this process. For knowing how you may feel right after this treatment and the experiences of different people with this process are given below!

Oil Pulling Task And Its Impact

Different people experience different things right after this session. Here are some side effects and instant results of this process which can affect you too!
  • In the starting phase, many people experience the headache which gets reduced with time. Within 1 day, this headache gets reduced.
  • This amazing detox treatment can help lose water weight and bloating. Many people have experienced reduced gas, digestive issues, weight gain and bloating issues!
  • Within 10 days of performing this ultimate body cleansing and oral health improving system. People have witnessed their skin glowing and radiant!
  • The oral health gets improved and gums become stronger day by day! Oral health issues and tooth decay gets significantly reduced!
  • The teeth become whiter and brighter! People would smile more openly to show off their stunning teeth!
  • The plaque and germs get significantly reduced and also it can be used as a mouthwash technique which fights germs and promotes healthy teeth!
  • Breath becomes fresh and the teeth become glittery white! Almost the given benefits are obtained through this process but it is suggested to consult your doctor before trying this technique.
  • If you are suffering from any disease or condition, you must perform it under guidance though; this method has yet not harmed people!
  • It is recommended to use continue brushing, tongue scraping and flossing as oil pulling is not a replacement for these cleaning techniques!

FAQ About Oil Pulling

1.  Who can perform oil pulling?

Ans. Oil pulling is a technique in which you need to swish the sticky coconut oil in your mouth. Sometimes even adults feel a gag like sensation in their mouth and thus, if your kids are performing this technique, it must be taken care of.


A kid or adult, anyone can perform this technique as it does not cause any harm and acts as a mouth cleansing process. Simply take care about gag reflexes!


2. Can I try oil pulling if I have tooth decay?

Ans. This is an amazing process for fighting oral health issues and gum problems. However, if the decay is extreme and is an infection which cannot be removed from oil pulling, you firstly need to consult your doctor and ask for suggestions. If there is no other issues in your mouth you can try oil pulling and can get rid of minor oral problems!


2. What is the best time to perform oil pulling?

Ans. The best time to perform oil pulling is early morning before eating or drinking anything. When you wake up, your mouth is filled with germs and bacteria. Oil pulling, during morning, would get you rid of all these bacteria and work as a detox process!


Also before you eat anything, this process removes the bacteria and germs from your mouth and prevents them from entering in your body!


3. Why must I swish the oil for 15-02 minutes?

Ans. While you swish oil in your mouth for 15-20 minutes, the germs and bacteria stick to the oil from each and every corner of your mouth.  Also from the between of teeth and various places, germs are removed.


Thus, to flush off the toxins completely, younger to oil pull for at least 15 minutes while the oil texture gets changed into mild white!


4. Within how many days will I get the results?

Ans. Different people experience different benefits of this technique in varied time period. Some find it beneficial on the first day for headaches while some get bright teeth in 3-4 days.


Ideally within a week, you would get brighter and cleaner teeth with reduced bad breath. Performing it further for a month can make open you with some new benefits!


5. Is it safe to perform oil pulling during pregnancy?

Ans. Oil pulling does not harm anyone as, you spit out the bacteria and germs which get stuck to the oil. Nothing is consumed and thus, it is recommended to continue. It relieved tooth issues and sensitivity but if you are affected with oral health issues, consult your doctor and then go for it!


6. What are the side effects of oil pulling?

Ans. Oil pulling is a cleansing treatment which does not have any major side effects. Generally, people feel gag reflex due to the stickiness and greasy texture of coconut oil. In this case, you need to use a bit less oil and perform oil pulling. Also swishing hardly can make your jaws sore. Thus, easily and gently swish the oil in our mouth and spit after 15 minutes!


7. Does oil pulling improve overall health?

Ans. Yes. We all know that mouth is the first place from where the bacteria enter your body. Your mouth consists of billions of bacteria which if not cleaned, can reach your body causing bacterial infections. Oil pulling eliminated and flushes out the bacteria which significantly can reduce the chances of bacterial infections and minor oral health issues!


8. How to ensure complete cleansing through oil pulling?

Ans. It is very important to ensure that the oil is removed from your mouth. To reduce oiliness and completely flush out all the bacteria, use warm water to rinse your mouth. Gargle with warm salt water and flush out all the greasy remains of oil from your mouth.


Also, end up this session with brushing and flossing for a clean, fresh and healthy mouth!


I had a great time performing this amazing treatment for oral hygiene. People are crazy about this amazing technique which can improve your overall health by triggering the basic elements, bacteria!


This is an amazing practice which can give healthy results if performed for a longer period. If you believe in different ancient techniques for fitness and health, this is a promising therapy which is worth giving a try!

Hatha Yoga Poses And Its Importance!

The majority of the yoga forms practiced in the west are classified under Hatha Yoga. So, what does hatha mean? Hatha means practising those physical yoga postures, including Vinyasa, Iyengar, Power Yoga and Ashtanga. Hatha implies forceful or wilful yoga, which also means balancing yoga. The practice of hatha yoga poses are designed for aligning and calming the mind, body, and the spirit, while preparing for meditation.


Hatha is a fantastic place to start practicing yoga. It is gentle and slow, and encourages the students to focus primarily on aligning their body properly and take the right form for supporting the bodies.


Hatha Yoga Poses


What Is Hatha Yoga Poses?

There are some very basic hatha yoga poses, which can be practised easily at home. Given below are some of the hatha yoga poses for beginners:

1. Mountain Pose


Mountain Pose


This is the first pose, which is to be started on the top of the mat. And, this will also be the last position in the set of exercises explained below. So, you will start with mountain pose and also end with mountain pose. After taking a few deep breaths, and calming yourself, you should stand tall, and start inhaling with your arms raised upwards toward the sky. Relax your shoulders, and stretch them to left while you exhale. Using the next inhale for drawing back to the centre, exhale and stretch towards the right.


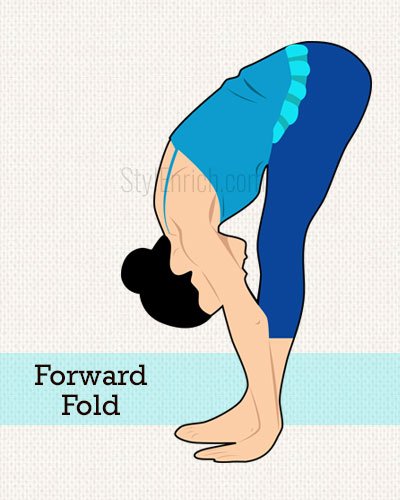
2. Forward Fold

Forward Fold I


This is the next stage of the hatha pose. Try exhaling while you fold forward. Let the arms, neck and hand hang to the ground. Take 3 to 5 deep breaths for relaxing yourself. Bend your knees slightly, and try to concentrate on lengthening the spine.


3. Low Lunge (On The Right Side)

Low Lunge (On The Right Side)


By placing the hands on to the ground, support yourself. Stepping the left foot backwards, release the left knee on the ground. Now, keeping the right knee directly aligned on the right ankle, and inhale so that you can lift up tall. Then, lengthen via the crown of the head. Using exhale for sinking forward, release the hips towards ground. Place your arms in a comfortable position on the ground, or on the hips, or even raised above, reaching the sky. Remain in this position for about 3 to 5 counts.


4. Downward Dog

Downward Dog Pose


 With your hand up, try to bring them back down towards the ground, and keep them on both sides of the right foot. Now, pressing into the hand, try to draw the right food back, and take the pose of the downward dog. Your fingers should be widely spread. The knees should be slightly bent and the hip bones should be reaching up above towards the sky. In this position, try to hang your head heavily, and let it remain here for about 3 to 5 counts.


5. Low Lunge (On The Left Side)

Low Lunge (On The Left Side)


As you try to raise the left leg upwards towards the sky, reach out through the toes, and inhale. While exhaling, draw the left foot forward, keeping it between both the hands. Now, drop the right knee to the ground, and dive the hips forward so that you find the low lunge on to the left side. Stay here for 3 to 5 counts or breaths.


6. Forward Fold

Forward Fold 2


Taking a deep breath, lift the right knee from the ground. Press the left foot so that you are able to bring the right foot forward. Now, try and release the torso so that you are in a relaxed forward fold position.


7. Mountain Pose

Mountain Pose


This is the same position from where you started off. Placing the weight evenly between the feet, inhale deeply, and roll up so that you are standing. Now, let the arms follow up, and take your hands upwards towards the sky. Exhale and release the hands to both the sides of the body, and take deep breaths.


Given Below Are Some More Hatha Yoga Poses And Names

Hatha Yoga Poses And Names

1. Warrior II (On The Left Side)

Warrior II (On The Left Side)


On the mat, step back with the right foot. Now, turn the right toes in such a manner that they become parallel to the back of the mat. Then, turn the left toes in, and taking a bend with the left knee, try to draw the arm upwards so that they become parallel with the ground. Try to remain in this pose, by glancing over the fingertips on the left, and stay there for about 3 to 5 breaths.


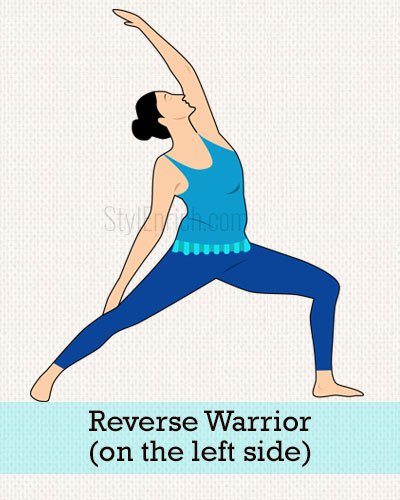
2. Reverse Warrior (On The Left Side)

Reverse Warrior (On The Left Side)


This is the reverse of Warrior II. Inhale deeply, and then drop the right hand on to the right leg. Now, take the left hand upwards towards the sky, for taking the Reverse Warrior position. Now, reach back and stretch the front portion of the body.


3. Warrior II (On The Right Side)

Warrior II (On The Right Side)


Keeping the arms parallel to ground, straighten out both the legs. Now, by turning the right toes so that they face the front side of the mat, exhale deeply. Bend the right knee, and sink into the Warrior II position on the right side. Take deep breaths for 3 to 5 counts, while you glance over the right fingertips.


4. Reverse Warrior (On The Right Side)

Reverse Warrior (On The Right Side)


While inhaling deeply, draw the right arm towards the sky, and take the Reverse Warrior position on the right side. For coming out, step the left foot slightly towards the front portion of the mat, so that it meets the right foot. Now, release the arms on both sides.


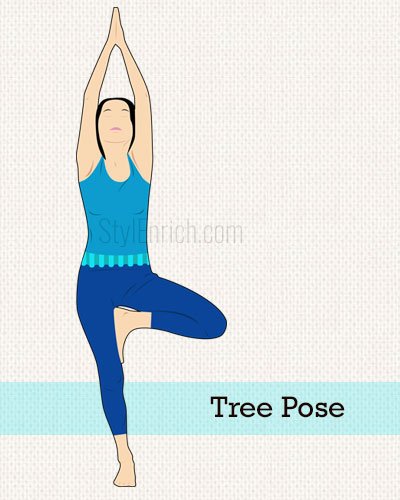
5. Tree Pose

Tree Pose


This is a very common stretching exercise. By drawing the hands to the hips, try to find a balance on the right foot. Now, place the left foot on the ankle, then, calf and then the thigh. Try to find a place where your eyes can focus, while you stretch your hands upwards towards the sky. Maintain the balance for about 3 to 5 breaths. Try to keep the stomach engaged, and you could even try to challenge yourself by waving the arms gently front and back. After you complete this, try to slowly release the left foot on to the ground, and try to repeat this tree pose with the other leg.


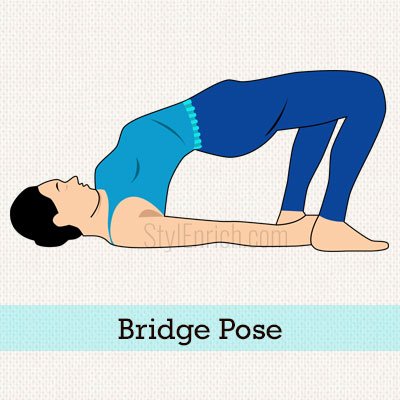
6. Bridge Pose

Bridge Pose


The bridge pose is useful for stretching the neck, chest and spine. Lie down on the back with the knees bent, and arms on the side. Keep the feet soles flat on the ground, and move the heels closer to the glutes. After exhaling, press the arms and feet into the mat, and push the hips in the upward direction. Clasp the hands below the pelvis and lift the chin up slightly, keeping the shoulder blades pressed down. Hold it for 30 seconds and then release it.


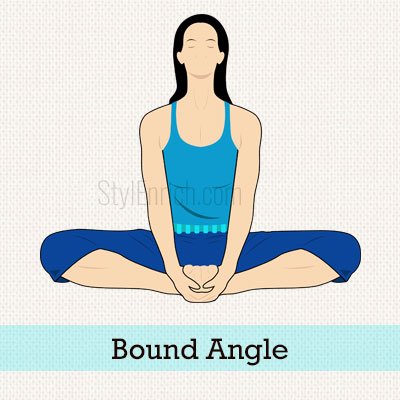
7. Bound Angle

Bound Angle Pose


This pose is also known as the butterfly pose. Sitting on the floor, bend the knees and place the feet together so that the soles touch each other. Pull in the heels towards the pelvis and press the knees down to the floor. Sit straight and try to relax the shoulders, and keep holding the pose for about 30 seconds.


8. Seated Twist

Seated Twist Pose


A seated twist pose is useful for stretching the hips, shoulders and back, and increases the circulation and strengthens the oblique muscles. For this, you will need to sit on floor, and extend the legs. Cross right foot over the left thigh, and place the foot on the floor, flat. Then, bend down the left knee. Move the left arm towards outside of right knee, so that the elbow touches the thigh. Twist the body towards right and hold on to it for 1 minute.


This was the hatha yoga poses chart. You can practice these, and see a difference in the way you think and feel. There are numerous advantages of practicing hatha yoga. Given below are some of them:


Benefits of Hatha Yoga Poses

As Hatha implies physically practising yoga, all the poses, which involve any kind of stretching, bending, balancing, twisting and squeezing the body, will fall under this category. The physical practise of yoga is different from the breathing techniques and meditation, which are also a part of the comprehensive yoga. When you exercise your body with all these positions, you do a lot of good to your muscles, joints, organs, and most importantly, your mind. Each hatha yoga poses give innumerable benefits.

1. Benefits The Heart

Regular practising of yoga can help in alleviating the high blood pressure. It will also help in reducing the angina problems, suffered by people with cardiovascular issues. Yoga also helps in improving the way the blood flow happens to the heart.

2. Builds The Density Of The Bones

Some of the weight-bearing poses of yoga, like the Triangle, Warrior I, Warrior II, Warrior III, Tree, etc. help in reversing the bone loss in the people, who suffer from osteoporosis. Only 12 minutes of exercise is required every day for building the bone density in the femur and the spine.

3. Strengthens The Core

The hatha poses help in improving the strength of the core. A strong core is very important for the body, as it keeps one functional, and wards off all kinds of injuries. The core consists of abs, spine and hips. Some important poses include Plank, Boat and downward facing dog. These help in strengthening the external oblique. Warrior 1 and Chair target the buttocks, while Chair and Half-lift also help in improving the para-spinal strength. These are the muscles that surround the spine and assist in bending and twisting.

4. Mobility Of The Joints

When the joints do not get much activity, they stiffen up and have a limitation in movement. But, with hatha yoga poses, your joints get worked in various directions, and this improves the flexibility and mobility. A 1 and half hour session of yoga every week helps in improving the mobility of the joints, particularly, the spine, for women in the age group of 50 to 70.

5. Stronger Back

Hatha yoga is also effective in treating the symptoms of lower back pain, and in preventing disabilities, which are associated with it.

6. Posture And Balance

Yoga also helps in improving the balance and posture, so that you don’t fall and hurt yourself when you hit rough terrains. You can also stand tall as your posture will be improved.
Do remember that all these exercises require focus and concentration. You can repeat these exercises a few times, but do them slowly so that you are able to concentrate on each subtle movement of the body. Doing these exercises will surely give you the peace of mind. Your breath will become your guide, as you gently inhale and exhale through the movements.

How To Apply Fake Eyelashes – Step By Step Guide!

Don’t we all envy those gorgeous looking lashes that women have? The beautiful eyes looking through those thick lashes can melt anyone’s heart. So, what is the secret behind those thick brows and the lush lashes? And, how does one actually get that kind of lashes? Well, it is not as difficult as it seems. One can easily get them by using fake eyelashes. But, applying fake eyelashes is a very tricky thing, as well. It requires a good amount of precision and concentration. If not applied carefully, the lash bands can fall off even before the night ends. And, that will be the ultimate fashion tragedy for anyone.  Let’s learn here how to apply fake eyelashes!


How To Apply Fake Eyelashes

What Kind Of Lashes Should Be Worn?

One should use the right kind of lashes, as the fake ones tend to look synthetic and heavy, sometimes. There are ultra-thin lashes available, and there are also thick ones available. Choose the type as per your natural lashes. Get your toolkit ready, and you will be ready to apply these lashes. All you need is a mascara, a set of lashes, and some eyelash adhesive, which will do the trick. And, of course, you will need some patience, as hurry might mess up things.

How To Apply Fake Eyelashes?

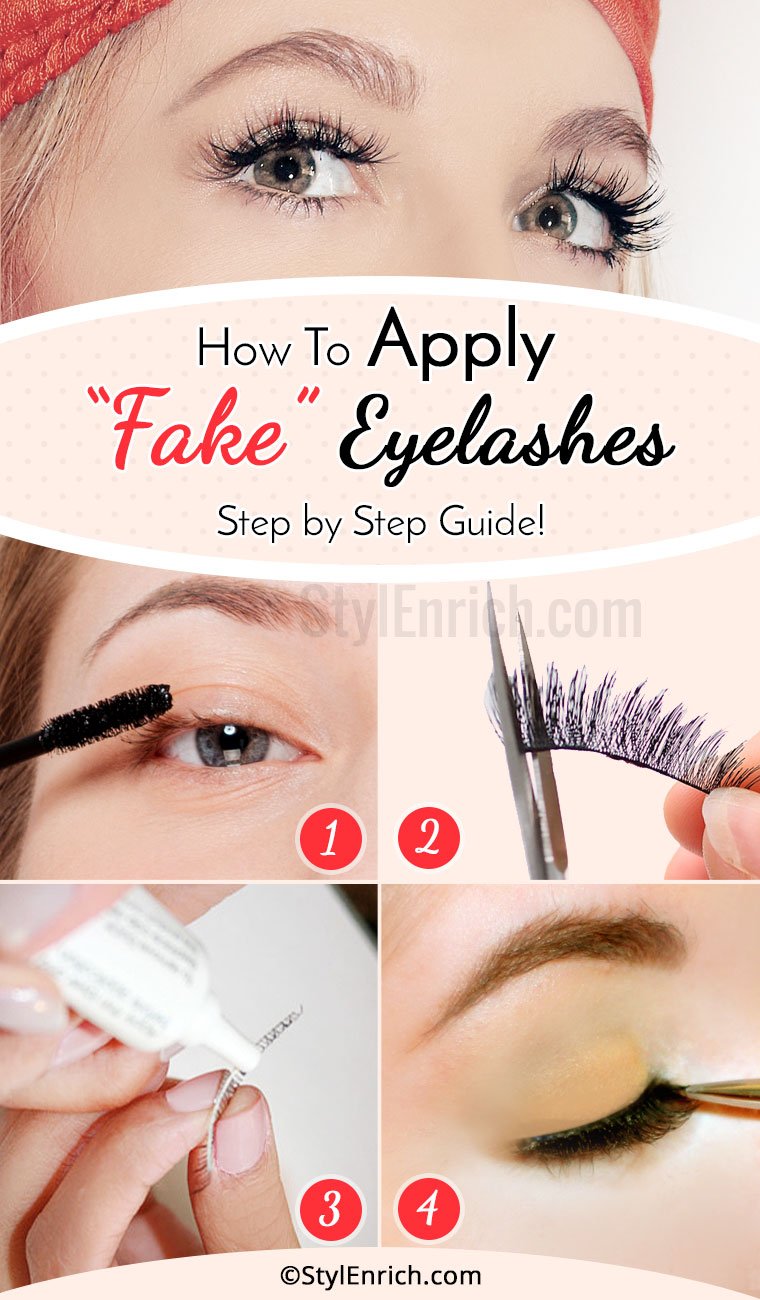
Fake lashes are to be placed properly and requires absolute precision. Given below is a step by step guide for applying the fake lashes:

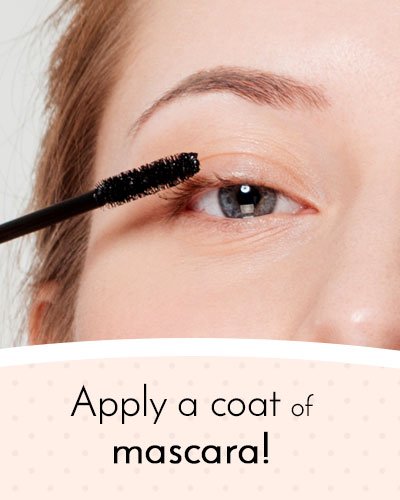
1. Apply Mascara

How To Apply Mascara?

Applying mascara is the first step. For this, you will need to curl the natural lashes, and then apply a coat of mascara on them. This will create a shelf for supporting the weight of the fake lashes.
 

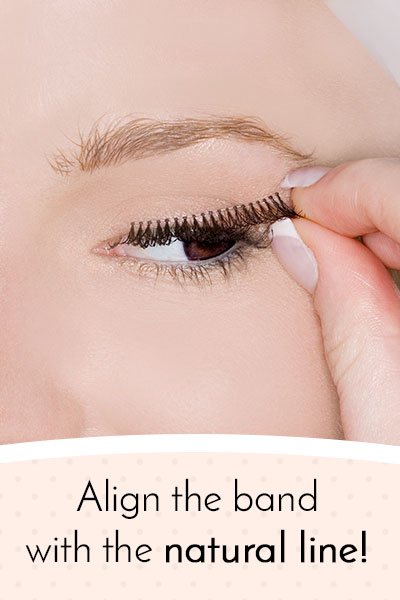
2. Align The Band With The Natural Line

Natural Line For EyeLash

The next step is to align the band with the natural line and to trim off the excess lashes. When the excess lashes are trimmed off, it will look more natural.


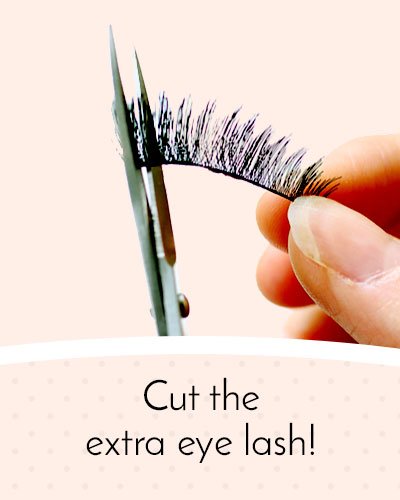
3. Cut The Lashes To Fit

How To Cut The Lashes To Fit

This step involves cutting the lash bands right in the middle of creating a large individual eyelash. This will make it easier to cut and paste. For this, you will need to have a correct measurement of your lashes.


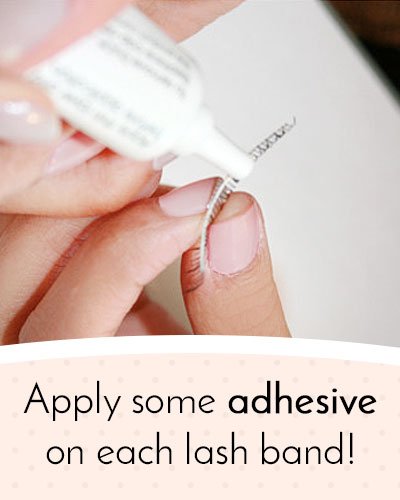
4. Add Some Adhesive

How To Apply Adhesive on Eyelashes

This is the stage, where you will need to apply some black adhesive on each lash band, separately. You will have to wait for a few seconds for allowing the adhesive to dry. Once dried, the adhesive can be easily stuck on the lash.


5. Put Them On

How to put extension on your lashes

This is the final step, where you can place the extension on your lashes. Remember to use your fingers instead of the tweezers. Start with placing it on the outer corner first, and then hug it to the lash line. If you wish to give it a more intense look, you could use put the outer extension a little bit above the natural lines. While applying the inner extension, try to avoid getting closer to tear ducts, so that you get a little more width on the eye. Closer to the tear duct will make the eye look narrow and cross-eyed.


Tips On Applying False Lashes

Though, applying fake lashes is not too difficult if you follow the steps carefully, you also need to know some tips and tricks, which can help you get a gorgeous look. Given below are some fake eyelashes tips, which will help you in having those perfect lashes.

Tip Number 1: Things Are Better With Curves

Eyelashes With Curves

When the lash bands are curved, it is easier to apply the lashes. Do not fret if you think you went overboard with it. It is actually quite easy to apply a harshly curved false lash on the eyes, instead of trying to pin down the ends of lashes that are straight. To get the U-shape on the lashes, you can either toggle the ends of the eyelashes between your fingers or try to wrap the lashes on any cylindrical object. As the lashes are not made out of 100 % human hair, it will not bend easily. So, you will need to put in some efforts to bend it right.


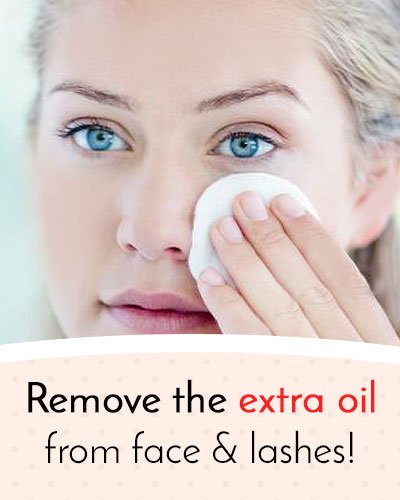
Tip Number 2: Keep It Oil-Free

Keep Eyelashes Oil Free

When there is oil on the lids, the lashes won’t bond. So, if your eyelids are naturally oily, try to remove the extra oil, using oil blotting sheets. And, in case, you are reusing the lashes, ensure that you do not remove them with a makeup remover that is oil-based. This will make the oil to stay there and make it hard to be glued back.


Tip Number 3: Keep The Elbows On The Table

Beginners need to have a good precision while applying the lashes. And, the mirror plays an important role in that. It should be placed correctly so that the lashes are applied successfully. A majority of the people apply lashes in a standing position in front of the mirror. This can make the hand to shake, and make you lose the grip. To avoid that, you could keep the mirror flat on the table, with the elbows on both sides of it. This way, you would be able to look down in the mirror, with the fake lash glued, and ready to be applied. This will also give you a good view of where the lashes are to be applied. Or, you could use a swivel mirror, and use them to be placed beneath the face. The angle will need to be adjusted, though. With the elbows propped up on the table, you can support yourself and apply. The mirror should be beneath the face so that it gives a perfect view of the natural lashes and the fake lashes.


In case, your hands are still shaking, you could put your chin on the table, as well. And, then, you would definitely not feel any shakiness.


Tip Number 4: Start With small

How To Start With Small Lashes

It is always better to start with small lashes and then go bigger. The half lashes or the accent lashes are short in width, and they cover only the outer half of the eye. These will be easily stuck to the eyes, without much issues. Once you master with the smaller lashes, you can graduate to the bigger ones.


Tip Number 5: Go One Step At Once

If you love the full strip lashes, but do not know how to set them correctly, you can try to cut them into 2 or 3 sections. Then, you can either use the half lash or the full strip lash. Then, you need to place these lashes on the lids. But, this tip might not work perfectly with the thick lashes, as people might be able to make out where these have been cut exactly. Better to go with lighter-density ones, and shorter lashes, which will look more natural.


There are lots of eyelash products available in the market, which will make you look smoldering and pretty. Check out reviews of these top 5 products.


Product Reviews On Top 5 Eyelash Products

1. Bea Luz Advanced Eyelash Growth Serum Eyelash Enhancer For Longer, Thicker Eyelash And Eyebrow

This is an awesome eyelash product for giving those lush and voluminous lashes. It contains potent ingredients, which can penetrate each and every hair follicle and can stimulate growth. It not only grows and thickens the lashes but can also restore the weak and thinning hair. It contains natural ingredients, which are completely safe. As per the reviews, using this product for 6 weeks continuously leads to a 55 % increase in the length and thickness of the lashes. To use this, you need to apply this serum, using applicator tip, on the root area of upper lashes.


2. False Magnetic Eye Lashes By Essy

These false eyelashes from Essy can give a complete makeover to your eyes. To use this, curl the lashes using an eyelash curler. And, apply mascara before placing the fake lashes. While using the lashes, bend this slightly, just as close to the curve of the eyes. Align these magnetic lashes on the top, and below the natural lashes in such a manner that magnetic strips are matched. When these are aligned properly, try to connect the lashes. Handle them gently while applying or removing. As per the customer reviews, these false lashes are excellent and are available at a reasonable rate. It is perfect and fits very nicely, and lasts for a longer period of time.


3. Vena Beauty Eyelash Growth Serum

Vena beauty eyelash growth serum is an advance formula for thick and long lashes. This is especially created for strengthening, magnifying and lengthening the natural lashes and brows. As per the reviews, only 2 weeks of using this product can help in lengthening the brows. It contains natural and nourishing ingredients, which is safe and gentle for all types of skin. The nourishing serum will help in improving the frail lashes. The serum gives long and lush lashes, and will not require piling on mascara layers. The ingredients are safe, and provide high performance.


For applying this serum, you should start applying from the base of upper lashes, with the help of applicator brush. Before you apply this, you should remove make-up and eye creams from the eye completely. Start from the inner edge of the eye, and go outwards, and then apply on the base of the lashes directly. Applying it every night before going to bed will give an effective solution. The users have got a 20 % increase in length and thickness of lashes in just 2 weeks, and almost 55 % increase in just 6 weeks. In fact, there is also a refund and replacement if the product is not found to be satisfactory.


4. 3D Reusable And Cruelty-Free Magnetic False Eyelashes For Eyelashes Edge 2017 For Natural Glamour

This awesome product has magnets, which allows for an easy application while having a strong adhesiveness. This does not have any glue. These are comfortable to wear and are reusable. The lashes are ultra-thin and gives you extra comfort. The magnets will need to be handled carefully so that they last for a longer time. It gives an amazing 3D finish, which gives a glamorous look to the wearer. The ends should be trimmed so that it can fit the desired length. As per the customer reviews, this product provides 100% satisfaction. It is rated as an excellent product and is also very easy to use. As the bands are thin, these give a completely natural look.


5. Dual Magnetic Eyelashes- Fake Eyelashes For Volume And Beauty – Enhance Your Eyelashes Instantly- Reusable, No Glue, No Mess

This Dual magnetic eyelash is so natural and beautiful that these will not look fake at all. For this, you need not even know how to apply fake eyelashes. They are lightweight and are made of premium synthetic fiber, which gives lush lashes, without causing any problem to the skin. They are environment-friendly and provide maximum comfort. As they are so light, they do not give any feeling of being worn at all. Also, these can be applied within seconds. You only need to connect the top and the bottom eyelash magnets, and these will help in enhancing your appearance, even when you are in a hurry and do not have time for makeup. These are also reusable multiple times and can be easily cleaned up. It only requires a moist towel for cleaning the lashes.


Now that you have read about how to apply fake eyelashes, you can wear them whenever you want, and flaunt them around. You will soon be known as the woman with those gorgeous lashes and will become the envy of many. It only requires some concentration and focuses from your end, and you would be good to go. Complete your eye makeup with those fake eyelashes, and you will have a smoldering set of eyes.

Thursday, 5 October 2017

Robots are replacing fast food workers at new Shake Shack

 Robots are replacing fast food workers at new Shake ShackRobots are replacing fast food workers at new Shake Shack
It’s the future of fast food bytes in the Big Apple.


 Robots are replacing fast food workers at new Shake Shack


Robots will replace humans and cash won’t be accepted at a soon-to-open Shake Shack in the East Village, reps for the popular burger chain said Monday.


Customers will place orders via an app and at touch-screen kiosks inside the restaurant, which is scheduled to open an Astor Place branch later this month, according to company CEO Randy Garutti.


Workers dubbed “hospitality champs” will guide diners through possible tech glitches as they place orders at the kiosks, which only accept credit cards.


Diners can also pay on smartphones and tablets using the restaurant’s app.


“The Astor Place Shack will be a playground where we can test and learn the ever-shifting needs of our guests,” Garutti said. “[It] represents our dedication to innovation and to providing the best for our guests and for our teams.”


Buzzers at the burger joint, which was founded by famed restaurateur Danny Meyer, will be replaced by text messages to alert diners when their food is ready.


The new notification model allows customers to roam outside the restaurant while waiting for their burgers, fries and shakes. When their order is ready, they pick it up at a counter.
The chain plans to use the Astor Place branch as a testing ground for the cashless kiosk model, which eliminates the job of cashier. It also gets rid of its traditional order placing area.
Staff at the new restaurant will be paid a minimum of $15 an hour in order to attract the best workers — at a time when areas such as New York, California and DC are transitioning to that as a minimum wage, Garutti said.
In the future, the chain also plans to offer high-speed delivery and innovative packaging, he said.
“We’re excited to lead with kiosk-only ordering, putting control of the Shake Shack experience in our guests’ hands, and an optimized kitchen with increased capacity for mobile orders and eventual delivery integration to support ongoing digital innovation,” Garutti said.
The new Shake Shack will have dining rooms and waiting areas similar to other New York City branches.
Shake Shack isn’t the only restaurant chain that has recently gone cashless.
Sweetgreen, a fast-casual salad chain with locations in Manhattan, stopped accepting cash earlier this year.

Concord Cumin Roasted Chicken Salad


Roasted Onions, Pears, Arugula, Cambozola 


Inspiration was somewhat lacking last night, I'm still stuck on concord grapes. I wasn't into the thought of mostarda, that concord jam though....


Roasted a chicken, heavily rubbed with cumin and salt. Didn't brush the concord jam on until the very end.


This was a one pan meal, high heat oven, first chicken and onions, pears added closer to the end of cooking. I thought about rice or potatoes, just didn't have the energy. 


Super delicious salad, satisfying, could have used a little tartness. I think next time, a little balsamic stirred into the jam to give it that little lift.


Photo

Guacamole Grilled Cheese Sandwich

Photo

Tuesday, 3 October 2017

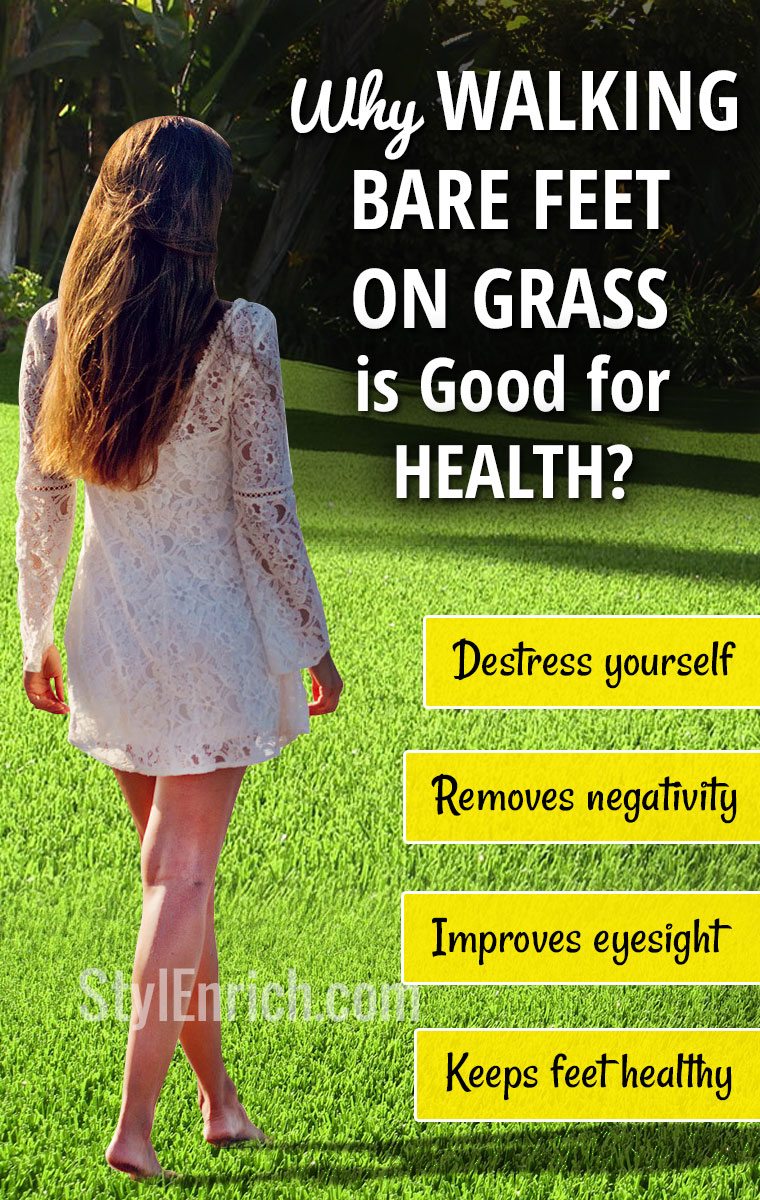
Health Benefits of Walking Barefoot on Grass!


Did you ever think about it? Walking bare feet is now scientifically explained and proven to be good for health. Earth can be viewed as a ball of energy which can be tapped by us and is proved to be beneficial. Free electrons from the Earth can be absorbed by our body when in direct contact. These free electrons help in keeping us healthy. This concept today is called “Earthing” and is one of the treatment methods used in wellness retreats and Spas. Let’s see the benefits of walking barefoot.


Early mornings and early evenings are the best times to take a walk. Going to the Gym is also beneficial. So how does it compare with walking or exercising outdoors? Doing regular physical exercises in the gym does bring in physical body changes and advantages. But for the soothing mental state you need to be outside and connecting with nature. Did not the cavemen walk bare feet on pebbles, rocks and grass? Also when we swim we don’t put on any kind of footwear, right?


Benefits of walking barefoot

Benefits of Walking Barefoot on Grass

Some of the benefits of walking barefoot are listed below –

1. Destress Yourself

By walking barefoot on grass or just the ground you are connected with nature. This connection brings in “good” feeling which helps you to relax and keep your mind peaceful. The very act of outdoors getting you to feel and sense nature at its best. The warm sunshine hitting your face, the wet grass in the morning under your feet activates your senses.


At least for the time you are outside you can switch off your worries and concerns. Observation of life and things around gets your mind distracted from any random thoughts. Also walking with like-minded allows you to strike a conversation and help you socialize. Exchange of thoughts and views also helps you to destress yourself.


2. Benefits of Walking Barefoot Improves Eyesight

In Reflexology, there are points under the feet to which if you apply pressure, it activates specific organ systems. The first, second and third toes are related to the eyes. Thus by applying pressure to those toes you can energize the eyes and remove any existing blocks. The green color of the grass is surely a pleasant sight and brings in calm and peace to the mind.


3. Keeps Feet Healthy and Toned

By walking barefoot the skin of the feet is stretched and kept relaxed. The muscles and tendons in the feet are also exercised and hence there is no chance of any sore feet.  The skin on the feet can get softer by continuous walking removing stiffness. Also for people who have flat feet, walking barefoot improves their flexor. Tired feet feel relaxed after a good walk.


4. Removes Negativity From The Body

The negative ions from the Earth’s surface are supposed to neutralize the negative energy in your body. By doing so it brings about a detoxifying effect and helps in reducing inflammation in the body. It also helps in resetting your internal body clock to normal.


5. Better Cardiovascular Health

Earthing is supposed to be good for the heart. The surface charge of the red blood cells is supposed to increase. This causes the blood to be less viscous and thinner. Thus blood blow through the heart is normal and there are no risks related to heart ailments.


6. Beneficial for Children

Children who are used to walking bare feet end up having no problems in the feet due to wrong footwear. In many cases, it is found that children who use the wrong footwear end up damaging their feet in the long run. Their feet get strained and the shape of the feet could also change in many cases. Children should be taught to connect with nature at an early age.


7. Better Sleep- Benefits of Walking Barefoot

By neutralizing the negative energy in the body “Earthing” releases stress and anxiety. Thus you could get a good night’s sleep. It also helps in balancing of hormones in the body which is very important for the women folk. Thus women will suffer from fewer menstrual issues. A good walk definitely gives you a good night’s sleep.


8. Absorption of Energy

Since feet are the only contact we make with the Earth normally it is the best medium through which we can imbibe the Earth’s energy. Thus walking without any footwear on grass or elsewhere aids in the direct absorption of this energy.


9. Reflexology Points

The feet are where a number of nerve endings converge from various organs. Thus by walking on grass these nerve endings get stimulated. As a result of this, the body remains in equilibrium. Any aliments or chronic pain in the body reduces due to this light massage of the feet.


10. Helps in Yoga Postures

Yoga is a holistic exercise addressing both physical and mental status. Yoga is done bare feet and with contact to the ground. Energy is picked up from the Earth while doing yoga.


11. Reduces Risks of a Backache

Walking without shoes allows you to balance your body weight properly. The equilibrium of the body is maintained which leads to good postures. Still body weight is distributed equally there are less chances of backaches.


12. Improves The Circulation of Blood in The Body

By exercising the pressure points under the feet, blood is pumped back to the heart and good circulation is maintained. For people with vein problems, this is beneficial and there is less stress on the heart. Thus there is more oxygen flow in the body.
 

Conclusion

If a simple thing like walking bare feet on grass can bring with it this many benefits, it is definitely worth a try. You don’t even have to spend a penny for the same. Thus nature has innumerable gifts and this is definitely one of them. Probably that is the benefit the animals get from nature all along. They are a good example of how closely a living being can be connected with mother Earth. Also, there is scientific evidence which shows that by walking bare feet on grass you could improve your blood glucose levels, immune system and heart health.


So what do you think? Planning to get that barefoot walk from tomorrow morning to get these health benefits? All the best!

AUTOMATIC RANKING OF TERTIARY INSTITUTIONS IN DEVELOPING NATIONS (A CASE STUDY OF NIGERIA UNIVERSITIES)

University ranking has become increasingly important in recent years among the general public at large because it creates a public platform...